Downloadable Sample Project
Dynamic Shader Compilation
It's not likely you'll often need to write shaders on the fly, but like many features, when you do need it, you're grateful that it's available as an option. Fortunately, the Godot Engine is great at exposing advanced functionality and making it incredibly simple to use.
In this short article, I'll show you how to easily and dynamically write shaders at runtime.
Ready?
It's worth bringing to attention, that the primary purpose of this guide is to show you how to write shaders at runtime. The exact example given here, would be best written using uniforms and not through runtime shader compilation. However, a shader sufficiently complex as to warrant runtime compilation, would be too complicated for a simple example.
material.shader.code = ... # Your shader code here
Well, maybe it's not quite that simple. Let's start by setting up a base project, and from there work towards recreating the example footage above.
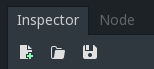
First we need a Shader resource we can use as our dynamic shader. If you don't already know, you can create a new resource of any recognized type, by clicking the new resource button in the Inspector.
As we'll be writing code into this shader at runtime, you can leave it blank if you like, but Godot will complain about an invalid shader (which just causes Godot to fall-back to the default shader). Easy fix is to write a bare-bones shader as a stand-in, but in this case, we're going to fill it in with code that mimics what we'll recreate dynamically.
shader_type canvas_item;

void fragment()
{
	COLOR = texture(TEXTURE, UV) + vec4(0.75, 0.0, 0.0, 0.0);
}
Save the shader and name it whatever you'll remember, as we're going to hook it up to a ShaderMaterial next. Once you've done so, go ahead and create the ShaderMaterial we're going to use, and use the shader we created in its Shader property. Save the material as well.
Now create a new scene, and drag the ubiquitous icon.png into the scene to generate a Sprite. Attach our newly created material, to the Material property on that sprite. Finally attach a new script to our sprite and save the scene. That's all the setup we require.
Time to get into dynamically writing shaders.
If we're going to write a shader, we should probably define what we want it to do. Since we want to mimic the example footage, we know we want to modulate the color of the sprite, cycling through each non-alpha color element in a specific order.
R -> G -> B
We also want to be able to adjust the intensity of the color modulation. That gives us a good starting point for our script. We now know what supporting functionality we need, and can put it all together to support the actual shader generation code, which we'll implement after.
extends Sprite

enum ColorOrder {
	RED = 0xFF000000,
	GREEN = 0x00FF0000,
	BLUE = 0x0000FF00
}

var update_shader = true             # Generate shader code on first frame.
var current_color = ColorOrder.RED
var current_color_intensity = 0.75

func _process(delta):

    if (Input.is_action_pressed("color_intensity_up")):

		current_color_intensity += 0.5 * delta
		update_shader = true

	if (Input.is_action_pressed("color_intensity_down")):

		current_color_intensity -= 0.5 * delta
		update_shader = true

    if (update_shader):
        pass # This is where we'll eventually update our shader.

func _input(event):

    if (event.is_action_pressed("change_color")):

        current_color = get_next_color(current_color)
        update_shader = true

func get_next_color(color_enum):

    if (color_enum == ColorOrder.BLUE):
        return ColorOrder.RED

    return color_enum >> 8

func generate_color(color_enum, intensity):

    return Color(0xFFFFFFFF & color_enum) * intensity
That's all the supporting code we need: listening for input events, flagging so we know when we need to update the shader, and the color methods which allow us to determine which color is next, and to generate that color.
Before we move onto the actual shader code generation, you'll need to modify the Input Map to add the input actions we're listening for, and map them to whichever keys you prefer. That exercise will be left up to the reader.
To generate our shader code, we're going to need a new method and a one-line addition to our _process method.
func _process(delta):

    # ...

    if (update_shader):
        material.shader.code = generate_shader_code(generate_color(current_color, current_color_intensity))

func generate_shader_code(color):

    return "shader_type canvas_item;\nvoid fragment() { COLOR = texture(TEXTURE, UV) + vec4(%f, %f, %f, %f); }" % [color.r, color.g, color.b, color.a]
That's all there is to it; now when you fire the relevant actions, the shader's code will be dynamically updated, the shader will compile in the background and you'll see the effects propogate into the running game.
Obviously there is some room for improvement here; that inline format string is pretty ugly. A better design for actual production code, would likely be to store your format strings in text files, which can be loaded and parsed before being passed on to the shader.
If you haven't been following along inside Godot, or would just like the additional functionality found in the example, which displays the color intensity and actual code being fed to the shader, then you can download this example project and try it out for yourself.